


 I've known today's guest since near the beginning of my blogging life. And I'm sure I'm not alone. Please welcome Dana of Made.
(Today's featured pattern after intro)
Dana started posting on my flickr boards. I think the first thing I saw her Sunshine shortie and I was instantly amazed by her photography but most importantly her CUTE kid clothes. And then I started to see many of her other tutorials linking up on other blogs and soon she was everywhere. Everyone had Made fever, especially me.

And who can blame us?
 Not only is Dana talented, stylish and savvy but she's also one of the sweetest bloggers I've ever 'cyber' met;) I really wish I will have the opportunity to met up in person someday.
I love how Dana makes sewing and do-it-yourself pattern making so accessible for beginners too.

And she has the BEST series! The Boy! Celebrate Mom! Celebrate Yellow!

Says Dana, "I have always enjoyed the craft it wasn't until I had kids that I realized, I loved it. One day I'll spend more time sewing for myself. But these days I thrive on making clothes for my kids and refashioning new items from old clothes. It's not easy sewing with kids around but since it's a passion.....I find the time."

Put me in the Zoo Dress above.
Dana, thank you for sharing your adorable pattern with us today! Please take it away.......
~~~~~~~~~~~~~~~~~~~~~~~~~~~~~~~~~~~~~~~~~~~~~~~~~~~~~~~~~~~~~~~~~~~~~~~~~~~~~~~~~
Hello Grosgrain friends. It's Dana from MADE. And like many of you, I've been following Kathleen's lovely site for years. So I'm honored to be a guest here today!
For the past two months, I've shared a slew of KID pants that are super easy to make and super comfy to wear.
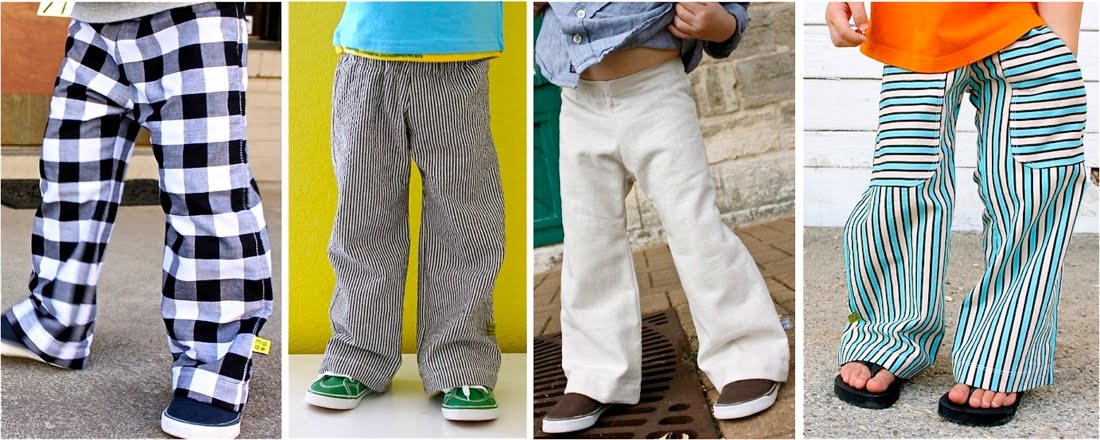
 Now we have:
 My little guy's gonna wear a lot of these come June, July, August (September, October, and November? You know what it's like living in Texas....)
 And they're gonna save on the clothing budget as well, since you only need about 1/2 yard of fabric!
 Adjusting the pattern from pants to shorts is easy to do.
First print off the Basic Pants pattern found HERE.
* You'll automatically be prompted to open the 6-page pdf in Preview
* Save and/or print the doc to your home printer
* Make sure you print in LANDSCAPE!
We'll be using the "flat front" portion of the pattern and using the Flat Front Pants tutorial to sew the shorts.
You'll need about 1/2 yard of fabric, 1-inch wide elastic, and your updated shorts pattern--which we're going to make below!
 To shorten the Pants Pattern you have options:
 I like a Bermuda shorts length--as pictured above on my son--so I used the bottom of page 2 as the cut-off length. Then I traced the top of the old pattern onto new paper (tape a few pieces of white paper together) and drew the sides of the legs about 1/2 inch wider on each side. This keeps the shorts from tapering at the knee.
 And you're got the front of your pattern piece done!
Do the same for the back pattern piece. Use the pants pattern to trace the top of the pattern piece,
 Then lay the new shorts front piece on top of that to trace the wider legs (so the front and back have matching leg widths).
 Lay both pattern pieces on your folded fabric and cut two of each.
Then follow the Flat Front Pants tutorial to sew them up.
 The only tricky thing with making shorts is that when ironing and turning things right-side out, it's easy to confuse the top of the shorts with the bottom of the shorts. I know that sounds dumb. But trust me, I've done it a dozen times...twisting and turning, trying to remember which side is the top. But with the flat front pattern, you'll always find the top of the shorts because one part is wider than the other (while the legs are the same width). This is how the top of the shorts should look:
 When you're done sewing, you've got a cool, fresh pair of shorts. Perfect for hanging out all summer.
 And for a Saturday stop at the donut shop.
 "Richard, do I have something on my face?"
 "Right here. Not here or here so much. Right here."
 Nope. Nothing.
 Thanks Kathleen for having me!
I look forward to another week of free patterns!
Thank you Dana for being a part of this month! I really couldn't have imagined it without you. You've been an inspiration for all of us in the blogosphere!
Stay tuned tomorrow for Shannon from Luv in the Mommyhood.


 Like not spending money?
14 {comments}:
Thanks for the tute!
"Did I hear a niner in there?"
This is a great pattern. I can make PJ shorts for my boys too with this. So great to have a boy pattern! Thanks for sharing with us.
Thanks Dana for showing me a better way to shorten and widen your pants pattern to shorts! I had done it a few times and it still came out very skinny in the legs! Now I can fix it...our poor Texas kids have had to wear shorts for the past month or two already ;)
Love it! My son needs shorts so I will be making him some of these. Thanks Dana!
Sweet! I am so excited to go check out all those great tutes! I really need the diaper cover!
I just made my boy some shorts. Now I am going to have to try these because this is what I was going for. I wanted them to lok more boyish, thanks! Another great tutorial & pattern
totally cool. love the donut action going on!
She is SO NICE! And I will use this tutorial many times.
I love Dana and I'm so excited for this pattern! Can't wait to use it!
I love them too...just wondering what size the pattern is for though...I'm thinking 4T?
How do you make sure the waist band doesn't look all funky after you sew it? When I've made shorts for my son before, the waistband looks a lot like a wide V before I do the casing, and that makes it seriously hard to get a nice looking pair of shorts. Any suggestions as to how to keep it from doing that?
Love this tutorial! I will be making a whole slew of these!
i love them but when I made them they seemed very narrow hopefully they will fit
These shorts are amazing!
Post a Comment