


 Finished. This is what your dress will look like by the end of today....Friday!

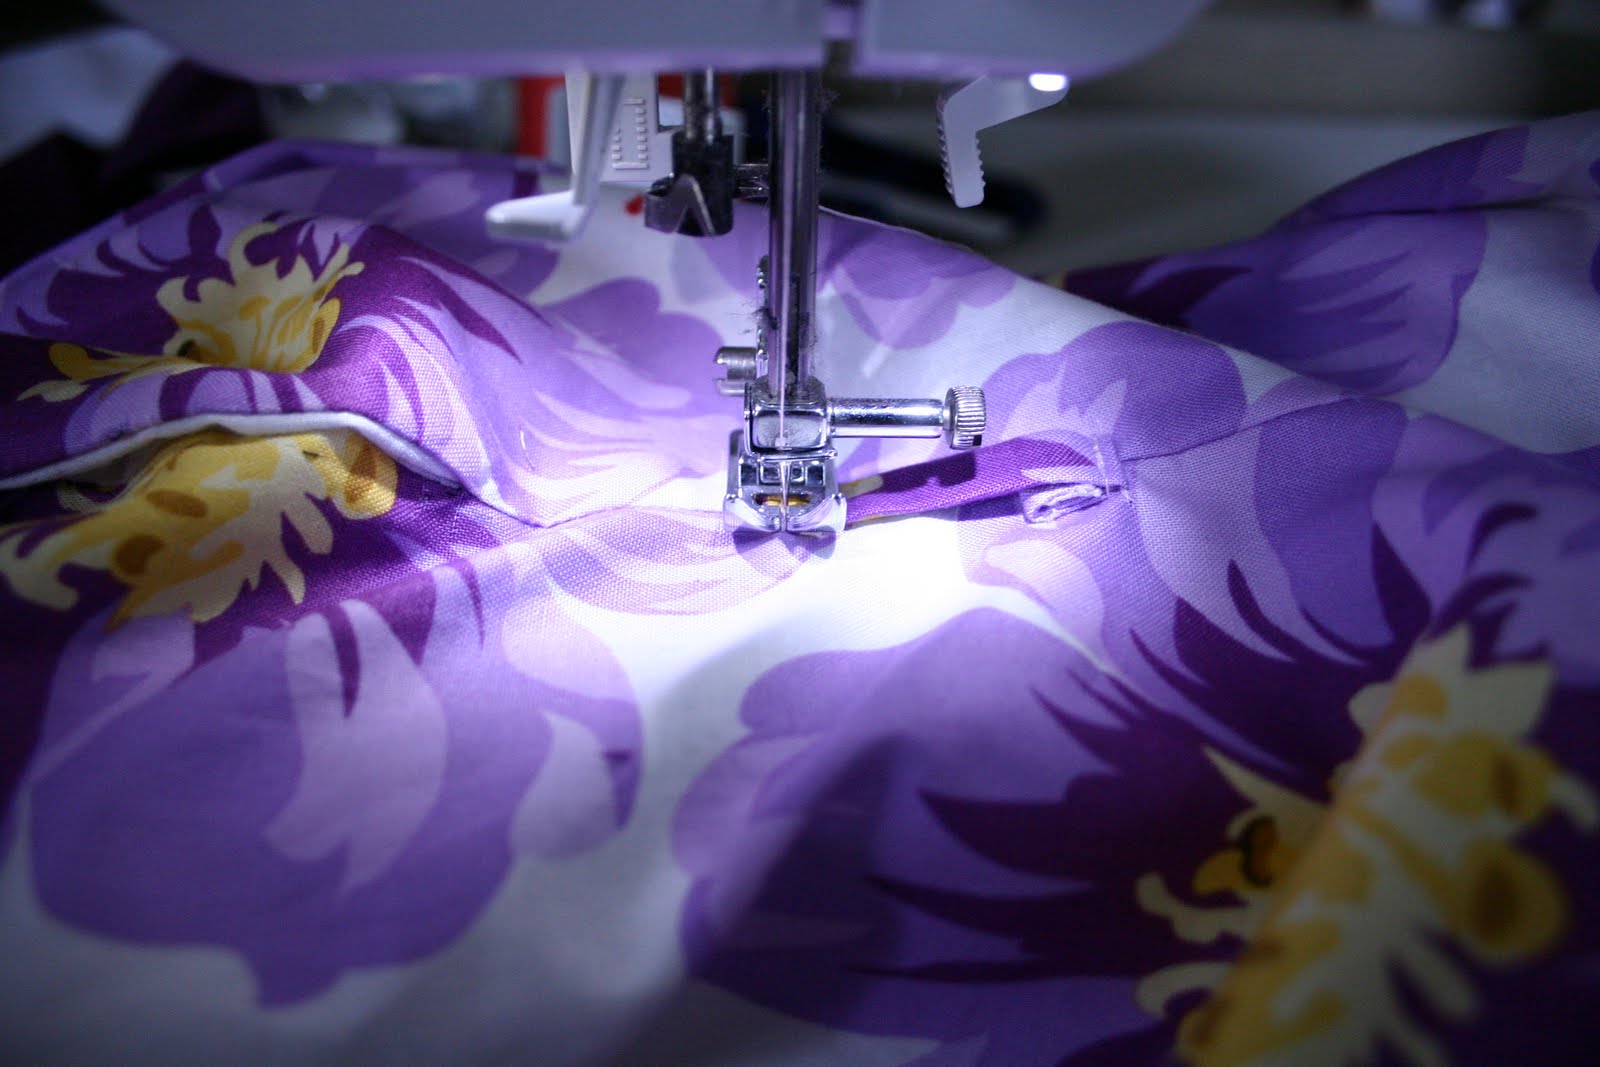
When yours fits fine, pin the bottom layer to the neckline as shown in the pic and
sew to neckline, leaving the top layer free. My yoke was a little too large so I had to make a tiny pleat in the center.

Step 2: Iron the top layer over by ¼”. Then pin it to the neckline so that it overlaps the stitch you just made.


Step 3: Turn dress to right side and ‘stitch in ditch’ of collar to secure top layer to neckline.

Step 4: Iron collar down.

Step 5: Take the bias tape you cut for the sleeve and sew it to the bottom of the armhole.

Step 6: Sew sleeve to armhole the same way you sewed the collar to the neckline.. By pinning the bottom layer of the sleeve to the armhole as shown in the pic and sew armhole, leaving the top layer free. Iron the top layer over by ¼”. Then pin it to the armhole so that it overlaps the stitch you just made. Turn dress to right side and ‘stitch in ditch’ of collar to secure top layer to armhole.


Step 7: Turn bias tape in and stitch along top.

Step 8: Attach belt loops. Measure 6 ¾” down from armhole, make a mark. Measure 2” down from that and make another mark.
Step 9: Roll ends of belt loop and sew to dress at marks.

Step 10: At hemline iron over by ¼” - ½” toward wrong side.
 Step 11: Fold over again toward wrong side by 1.3” and stitch across. If you are adding the elastic in the hemline leave an inch open.
Step 12: Thread 38” of 1” wide elastic through with a safety pin. Once both ends come out the opening you left in the hemline, stitch together and close opening.
Post your frock on Grosgrain flickr and you’re DONE!
A few things I want to say about this dress. This dress was a little more challenging than the first so if you finished give yourself a BIG pat on the back because I struggled with this myself.
Very tricky, tricky. The instructions were vague, unclear and confusing. I had to guess my way through it and use them as a loose guide. I had problems with the button tape and the slit to make it as did a lot of you. I know I have to get some pics to you still about that issue. I’ll be trying to get those out later today.
But I’m very pleased with the finished look of my dress! I’ll be wearing it to pick up Lily from kindergarten today and hope I will get a couple compliments as I walk through the halls:)
And remember to post on Grosgrain Flickr!
About Frock by Friday™
Link to this project

Join In: Here is the pattern.
Here are the instructions.
Link to this project
Join In: Here is the pattern.
Here are the instructions.


 Like not spending money?
15 {comments}:
I can't wait to see some pics of the dresses that people have made. So sad that I couldn't play along this week!
The dress looks great! Very Fun! I do hope to participate in a Frock by Friday soon. What a great idea!
I hope you do another one soon and I hope it's more beginner-ish oriented. This one is tricky! Although- I have to say- your dress looks fantastic!
I finished! Of course I look horrible today, so I'll have to doll myself up tomorrow and post some pictures.
Your version looks great! I can only finish mine next week as I couldn't sew Wed and Fri. Hopefully, there will be no more disruptions!
I love the fabric you chose!
I have a problem. Mine turned out HUGE! I used the measurement guide, but I think I overestimated with seam allowance. So, I am worried to take it in because I am still learning to make my own cloths. What I do? It is too big around the waste and hips. I look like I am wearing a boxy night gown;(
Bren Bren,
First don't worry. It's all fixable.
Put it on inside out and pinch it on the sides until you have a fit that is comfortable for you. Pin it. Take it off and sew down the sides.
If you put in pockets you'll have to either rip them out and start over or get rid of them.
As far as problems go, it's a pretty easy one to change. Especially with a shirtdress because there's not seam at the waist.
If you have a problem just send me another comment.
Thank you so much for doing this! I had so much fun creating my dress and yes I did make a few mistakes but I absolutely love how mine turned out and loved knowing other women were creating right along with me! Cant wait to do another one, please do it soon :) Thanks again!
I finished it and I love it...I like that this was a more tricky pattern You were so helpful with the questions and I was able to easily figure out the things that I was having trouble with. I could easily make this one again with some variations too! This was never a pattern that I would have chosen and so I am so glad that I learned how to make it! When are you doing another one of these frocks by friday..I am addicted! THANK YOU j
I finished my dress! It went pretty smoothly and it was really helpful having the detailed pictures rather than just the sparse drawings on a regular pattern. I haven't done a yoke for so long- and I think this was my first button band like this one. Very handy dress to practice a bunch of good techniques- Loved "stitching in the ditch"! thanks so much for doing this.
http://littleLumpkin.blogspot.com
Thank you so much for doing this walk-through. I finished my dress and posted it on Flikr. I am positive i could not have made this dress without your help...and I love the way it turned out! I have more pictures comments on my blog.
http://farahmakesstuff.blogspot.com/2010/06/frock-by-friday-done-on-monday.html
I just found out about your blog. Can't wait for you next dress sew-a-long. I'd love to joint in.
ok so i want to make this dress for my mum but im having troble reading the size chart she wears a size 10-14 dress but i dont know what line to cut along because it doesnt go by dress size if you could please help that would be great thank you and sorry im kind of new to sewing
i just came across your blog. this dress is BEAUTIFUL!!
i wish i could do buttons.. i love your fabric choice! :D
Post a Comment