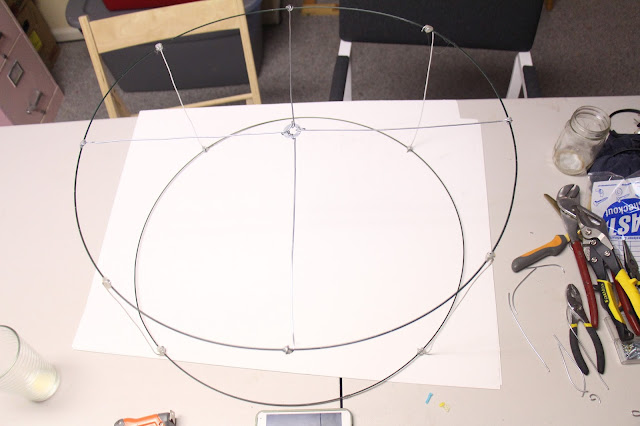
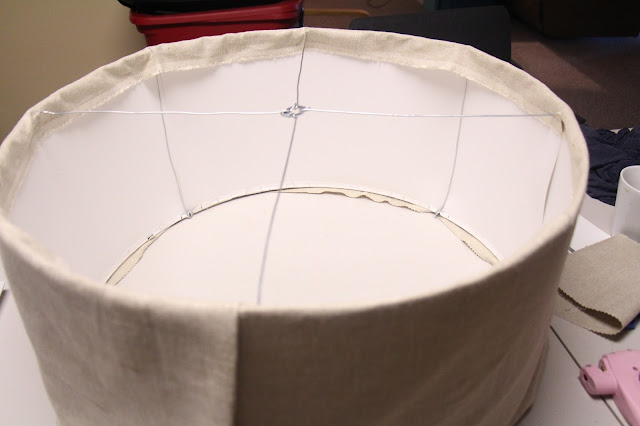
I priced drum shades to fit over the chandelier but for some odd reason the universe has decided that drum shades over 12" are supposed to be really expensive. I don't quite know why. It's just two metal hoops with fabric. How that comes out to be a couple hundred dollars by some website standards is beyond me. But I digress. I decided to make my own drum shade instead and this was the result.
I removed the chandelier, painted it aqua blue and reattached it with the new drum shade I had made. I also sprayed flame retardant spray on the inside and outside of the chandelier since as you can see the light bulbs came really close to the fabric. They aren't touching but I had to bend the lights inward or else they would have. They look closer than they really are in this photo. In reality they are 3" from the interior fabric.
I like how the light looks when turned on and this photo doesn't do it justice. But it casts a very nice bright but subdued light and makes a very interesting pattern on the ceiling.
I eventually want to purchase an entirely new chandelier so I didn't want to spend a dime on revamping the old one. So I decided to make one of my own using only materials that I had on hand. Those materials ended up being:
Two 30" wreath forms (leftover from February's craft night)
3 Poster boards
12 gauge wire
a metal washer (the only I bought at the hardware store for .40 cents)
spray paint
linen
1 yard of patterned fabric
Step 1: Gather your materials. Don't forget your needle nose pliers.
Step 2:Remove the outer most circle from your wreath forms.
Step 4: Wrap the wires around your wreath frame trying to center the washer in the middle.
Step 5: I have to say that I don't think that this step is necessary and it ended up causing my shade to misform a bit so I would recommend skipping it but I'll tell you what I did anyway in case you find it is necessary. I used another piece of wire to attach my top wreath form circle to my bottom wreath form circle about 1' long. I made four of these and attached at opposite ends of the wreath form. But I think the next step should be enough.
Step 6: Take your cardboard and cut it to the desired height.
Step 9: Now hot glue your linen fabric to the outside and inside of your shade. Be sure to pull it taut as you glue.
Step 10: Now you can add more things like trim and inner fabric using your hot glue.


 Like not spending money?
1 {comments}:
C'est vraiment magnifique, bravo à vous, j'adore
Post a Comment