


 Boy, do I have a great pattern for your next summer escapade. Please welcome the most adorable Novita from Very Purple Person and her Scalloped Hat Pattern.
(Today's featured pattern after intro.)
I found Novita's blog oh-so-long ago. She was one of the first blogs I began to follow. I can't even remember what exactly led me to her site but I'm pretty sure it had something to do with the stylish boy clothes she was sewing for her son back in 2008. PS. She's a great resource for those sewing moms out there who don't have girls;)

Linen Jacket and Pants above.
Novita is a stay at home mother living in Tokyo, originally from Indonesia, since moving to Tokyo, she began making stuff for herself and her little family. Says Novita, "I want to be able to make my whole wardrobe!"
Grey Jacket left. Dotty Leia Dress right.


Novita is a stay at home mother living in Tokyo, originally from Indonesia, since moving to Tokyo, she began making stuff for herself and her little family. Says Novita, "I want to be able to make my whole wardrobe!"
Grey Jacket left. Dotty Leia Dress right.
She's made a lot of clothing from Japanese patterns despite the fact that she says she still can’t speak nor read Japanese. Says Novita, "The diagrams (and several lucky guesses!) really help me."
Batik Top with Bow Broach left. Dress N right.
Batik Top with Bow Broach left. Dress N right.


But what I also really love about Novita's site is that she makes a lot of the patterns herself or alters them from various sources. In fact, it's only been recently that she's ventured into the joy of vintage sewing patterns!
Vintage High Waisted Pants left. Vintage yellow cord suit right.
Vintage High Waisted Pants left. Vintage yellow cord suit right.


I also love looking in on her interesting life. She's also one of the few (perhaps only) sewing bloggers who sews for her husband.


I love Novita's style. It's young, hip and super stylish. I could definitely see myself wearing any one of her lovely pieces.
All Made Up and Nowhere to Go Dress left. Flat collar blouse right.
I love Novita's style. It's young, hip and super stylish. I could definitely see myself wearing any one of her lovely pieces.
All Made Up and Nowhere to Go Dress left. Flat collar blouse right.


She's so prolific. Going through her blog I found so many things that I wish I could have fit into this post. But there's just too much to put into a tiny intro. You should really go for a blogride into her archives sometime for more wonderful sewing eye candy.
Little Black Dress left. Gold Dots Dress left.


Little Black Dress left. Gold Dots Dress left.
Her bags always look so well constructed. She's a wiz with the machine. But she doesn't just show off what she's made, she hares her tutorials with her readers which I LOVE since as we all know I love FREE patterns;)
Too Many Bags Post below.
Too Many Bags Post below.

Please, welcome....Novita!
~~~~~~~~~~~~~~~~~~~~~~~~~~~~~~~~~~~~~~~~~~~~~~~~~~~~~~~~~~~~~~~~~~~~~~~~~~~~~

Thank you Kathleen for inviting me to this wonderful month and hello to all Grosgrain readers!
My name is Novita from verypurpleperson and I'm going to share a tutorial on how to make a scallop hat.
You might have known that scallop is suddenly everywhere now! So why not another one to embellish your head? Actually I got my inspiration from seventies fashion book, a proof that fashion recycles itself. Either way, this wide-brimmed hat is perfect for summertime. And if you want, you can smooth off the scalloped edge on the pattern to create an ordinary wide-brimmed hat!
Download the pattern here.
The hat fits 56-57 cm (22-22.5 inches) head.
There are 5 pages that should be printed on A4 size paper. Glue or tape together the pattern together matching the marking signs and cut the pattern pieces on the thin line. 1 cm (3/8") seam allowances are included. There are 4 pattern pieces for this hat: Center Back/Center Front, Side, and Brim.
Note: If you want round brim hat, cut on the grey lines.
Materials:
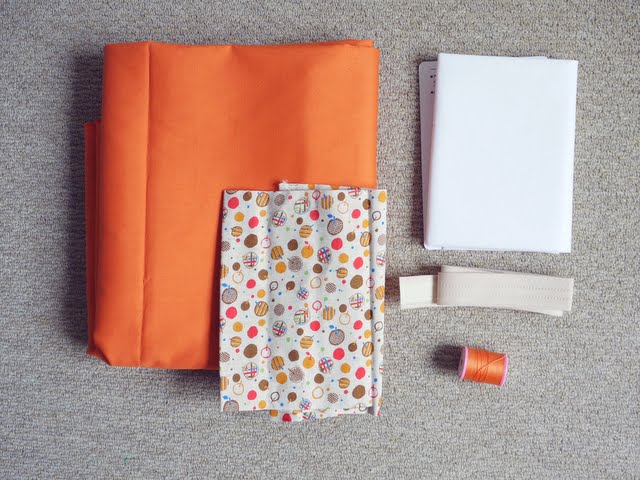
- 0.8 m/yard main fabric, preferably medium weight or upholstery weight.
- 0.25 m/yard lining fabric
- 0.5 m/yard fusible interfacing for the brim of your hat. Use stiff interfacing for hat.
- Hat tape, if available, or you can also use wide grosgrain ribbon
- matching thread
Instructions:
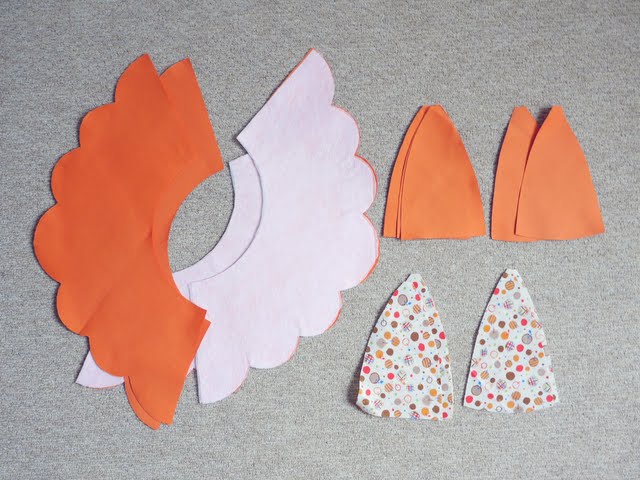
- Cut all pattern pieces:
- Center Back/Center Front: 2 X main fabric, 2 X lining
- Side: 4 X main fabric, 4 X lining. Transfer marking points to fabric pieces. I use erasable marker.
- Brim 4 X main fabric, 2 X interfacing. Iron interfacing to 2 of the Brim pieces. Transfer marking points to fabric pieces.
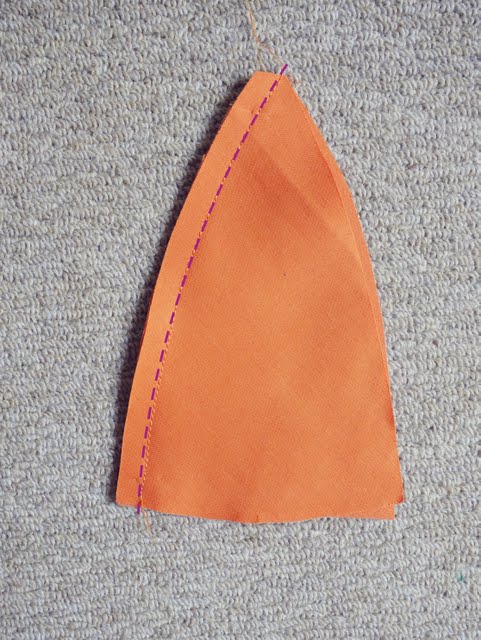
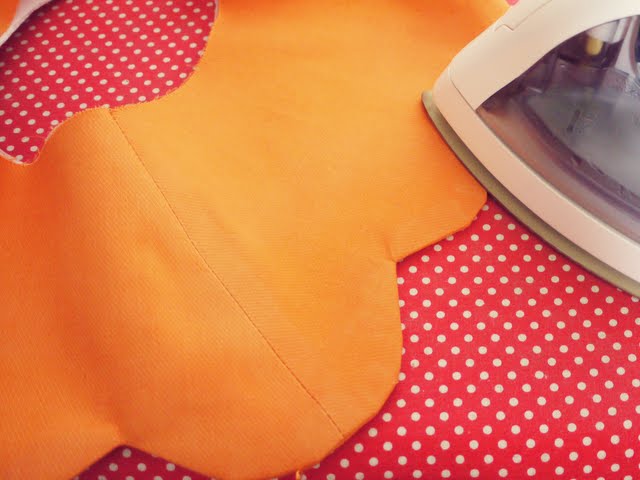
- Place one center back/center front piece on the side piece with right sides together. Sew along one curved edge with 1 cm (3/8 inch) seam allowance. Clip curves and press to the right side

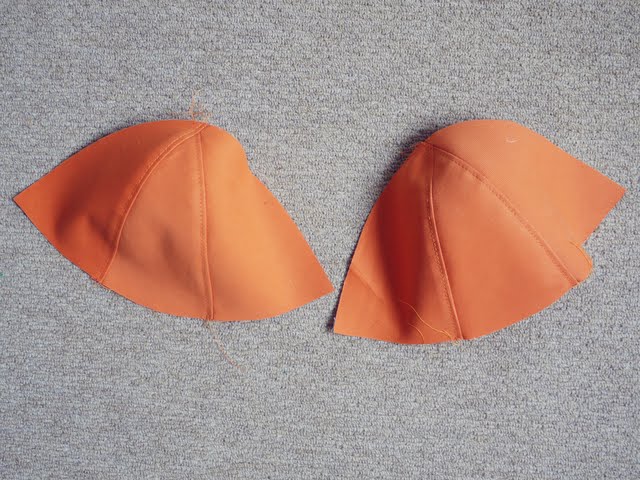
- Sew another side piece on the other side of center back/center front piece. Now you have a 3 panelled piece. Clip along the curved edge. Press seam allowance to one side and topstitch from the right side.


- Do the same with the three remaining pieces.
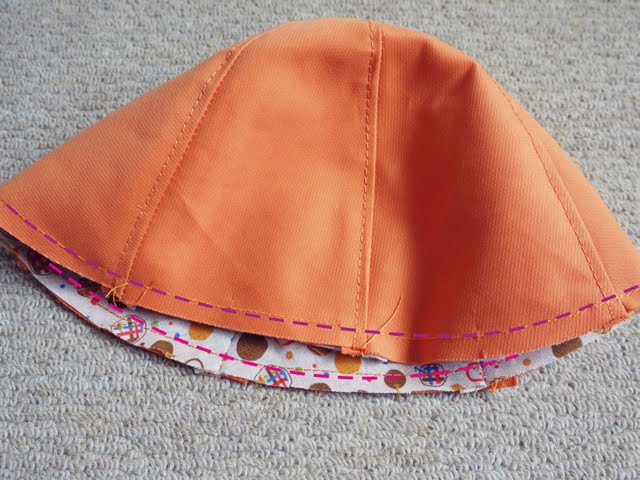
- Put the 3 panelled piece on top of the other, right sides together. Sew along the curved edge. Press seam allowance to one side. Turn right sides out and topstitch along the seamline.


- Do the same with the lining pieces, but omit the topstitching.

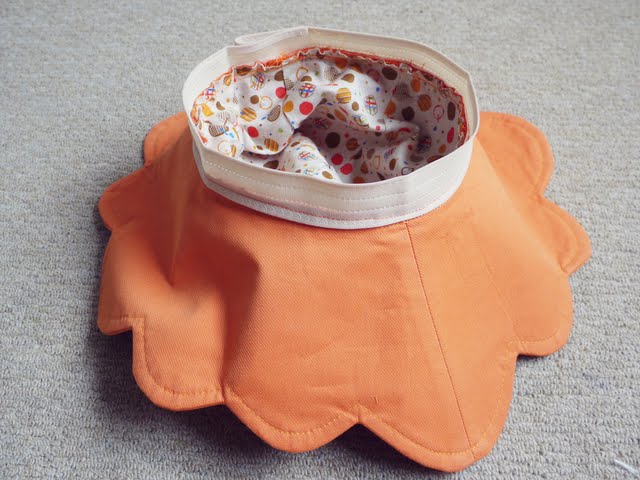
- Place the lining inside the hat, wrong sides together. Machine baste the bottom edge.
- Place the two brim pieces with right sides together, sew on both the straight line. Press seam allowance open. Do the same with the remaining two pieces.

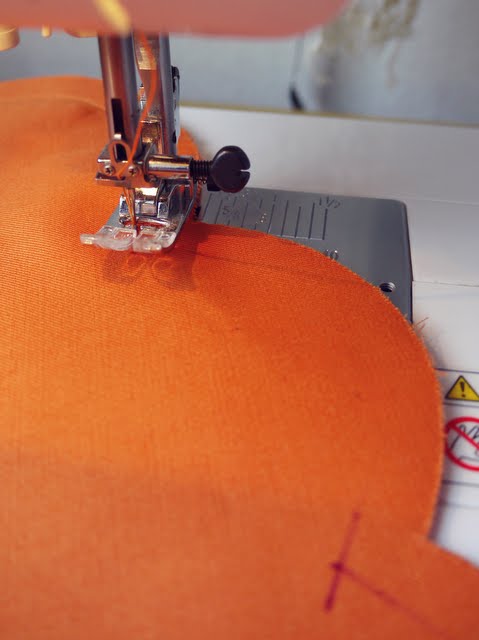
- Place interfaced brim on top with the non-interfaced brim, right sides together and matching all marking points. Use smaller stitch length and sew along the scallop slowly.
- Tip: Mark the pivot point on the corner of each scallop with erasable marker. Measure 1 cm (3/8") from the edge near the corner and mark. Do the same with the other edge. The marking lines will create an 'X' that will serve as your pivot point.

- When reaching the pivot point, stop sewing and let the needle down. Lift the sewing foot and move the direction of fabric. Sew slowly!


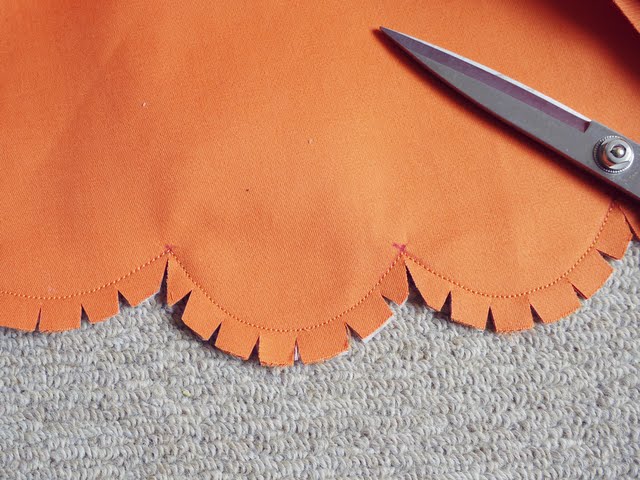
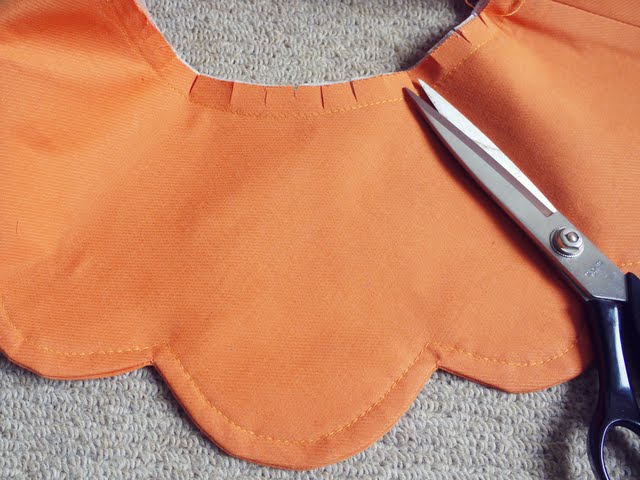
- Trim seam allowance around the scallop and clip the curves. Pay attention to the corner between scallops, clip here until almost reaching the stitching line. Be careful!
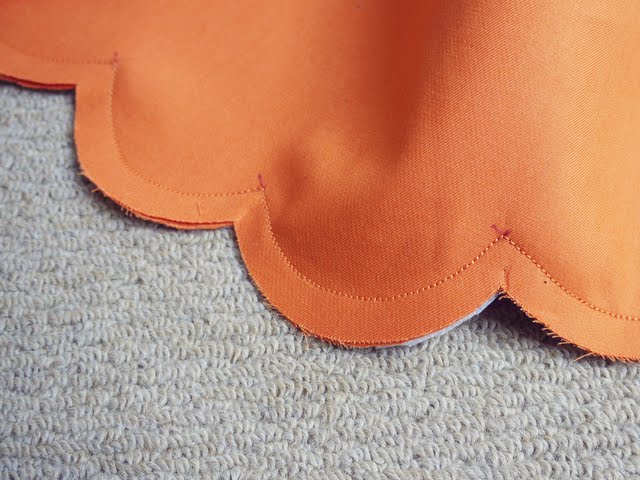
- Turn brim right sides out. Use blunt tool to smooth the edge around scallops. I usually use chopstick. Press the scalloped edge.
- Set the stitch length back to normal and topstitch around the scallops slowly. Pay attention to the scallop shape to keep the shape smooth.
- Machine-baste the inner circle of the brim. Clip the seam allowance to make it easier when sewing the brim to the top of the hat.
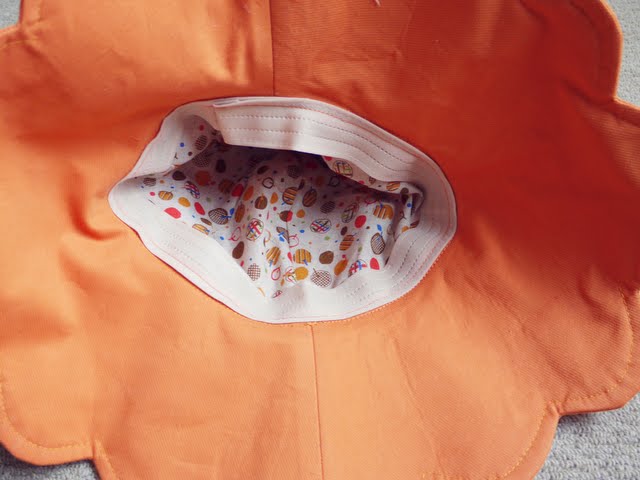
- Match the center marks on brim with the marks on top of the hat. Also match the seamline on the brim with the seamline on the top of the hat. Sew around with right sides together.

- Move the brim and hat on the left side and place the hat tape on the seam allowance. Sew near the edge to secure the tape on the allowance. When reaching the end, fold the tape and sew across.


- Move the direction of the tape to the inner side. From the outside of hat, topstitch about 4-5 mm from the seamline to keep the tape in place.

- Your scallop hat is finished!

Thank you Novita for offering such a timely and unique pattern for Free Pattern Month! You are such a wealth of gorgeous sewing inspiration.
Stay tuned tomorrow for Rae of Made by Rae.


 Like not spending money?
8 {comments}:
I have been one of Novita's followers for several months and was lucky enough to win one of her adorable wallets! She's truly an inspiration! Pool season is open now so I'd love to make this hat to wear when I go! Thanks for featuring one of my favorite sewing stars!
Totally, totally darling! I love the hip stylish look of the fabulous hat! What a lovely idea! So sweet!
xoxo,
Sunni
This monthly feature is amazing- free, loevly patterns and we get to discover ace blogs. Thanks Kathleen!
This is amazing, thank you so so so much from the both of you!
Wow! Thanks! I can't wait to make a hat. This project is for sure!
Oh so fun! Thanks for sharing!!
I love her! She seems to be so sweet!!
Gorgeous hat..makes you look like a pretty flower fairy!! Have added it to my summertime tutorial roundup on my blog :D
http://www.thecraftimaginarium.co.uk/2012/05/tutorial-roundup-summertime-d.html
Thanks so much for sharing!!
Post a Comment