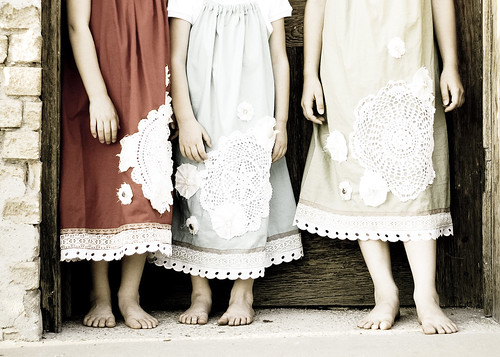
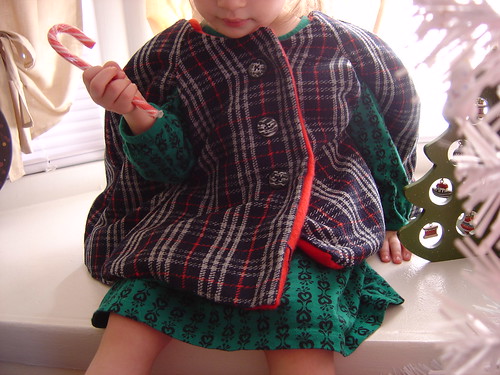
 Just wanted to drop in and show my readers the fabulous work that the members of Grosgrain flickr group have been up to.
I love to see the amazing things that crafty mothers have found the time and talent to make!
CLICK ON THE PHOTOS TO BE TAKEN TO THE FLICKR USERS PHOTOSTREAM.
 Look at these lovely dresses! The photography is AMAZING. I always take special interest in creative ways to photograph a piece. I think the right setting can make a piece truly stand out!
I've had a lot of readers ask me for advice in taking their photographs. So I thought I'd include a few tips I found on etsy from user JOYouz.
1. Try to always take photographs without using flash. It is hardly ever flattering to your item. Flashes wash out colors and details – and even the entire photo if you are taking close up shots.
2. Early morning and evening (right after sunset) are the best times to do photographs outside or in a WELL lit room inside.
3. When photographing small items, check to see if your digital camera has a macro mode.It will be shown on your camera with a tulip icon. Check your manual. It has made all the difference in the world.
4. Set up your own photography studio. Setting up a professional one can cost $400 - $1,000. Yikes! But you can try to assemble a homemade one for far less! Only $50.

Purchase a :
1. Rubbermaid (or some other brand of) semi clear, frosted plastic container turned on its side. Mine is 15" x 35" but you can use any size that fits your room and needs best.
2. Cover with a white, plain el cheapo bed sheet.
3. Clip on lamps - 3 of them
4. Use clean blue bulbs (NOT regular household incandescent bulbs). Be sure to use daylight light bulbs - they produce a much nicer light than normal incandescent (which produce a yellow cast) or fluorescent (which produce a green cast) light bulbs. The brand I used (any brand is fine) is GE REVEL 100. Most brands will say something about "clean, beautiful light" or "enhanced color spectrum" on the package.

5. Use any large sheet of paper or poster board to line the inside of the container. This serves as your seamless background (helps eliminate outside shadows). You can use colors also but it's a pain to switch them so I have stayed with white - which I think looks more professional.
Photo credits from top to bottom: vintagefern; *Mirre*; BellalovesJulia; Woundupladybug; A Vision of SugarPlum; Ohsohappytogether; hexchenmarie


 Like not spending money?
7 {comments}:
hi
thanks for your photography tips. I'd love to see pics of your home set up. It would make it easier to picture it...should you get a chance!
thanks
-t
I totally would love to see it too. Your pictures are amazing. Do you clip the lamps to the inside of the container? or outside? Thanks!
These are very beautiful shots and creations too! Such a nice inspiration. I like the dresses on "The feet" :-) and the baby dress with yellow ribbons in front. But all the pictures posted and how they are taken are wonderful :-)
Thanks for posting.
What pretty clothes! Very inspiring!
I really like that tye back.
God Bless You and Yours!!!
Hi, I love your clothing for girls. I have two young boys and am just learning to sew. I would love to make some really fun clothes for them. Could you recommend a source for patterns for boys. Thanks so much.
Okay, so I just noticed that you posted the photo of my three girls feet,(and their dresses) I have to admit I got a bit giddy, thanks!
My friend took that picture and she did an awesome job.
Post a Comment